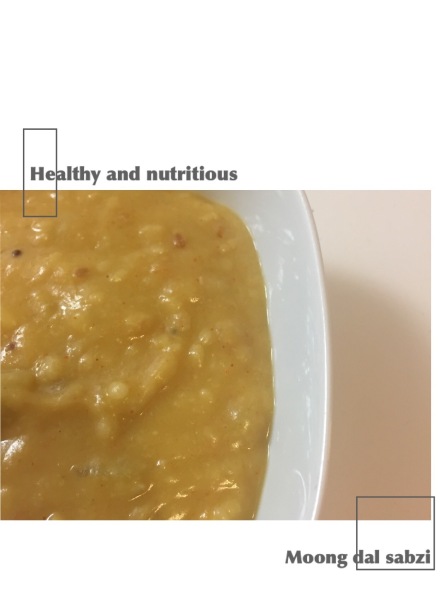
Moong Dal Sabzi/ Split Yellow Lentils

Have you wanted to make something healthy yet yummy? Something that doesn’t require buying 100’s of healthy ingredients before getting started? Well, I’ve been there and most of the time I’m inspired to cook healthy meals, I often end up not doing it because I do not have those ingredients in my pantry and then you know what happens :p Mission healthy food : FAILS! Hahaha

But who comes to rescue during these tragic moments of course my MOM 🙂 This lentils recipe is not only super yummy but super super healthy as well and guess what : all the ingredients used are almost available all the time. So instead of having you all to read more of my stupid tragic stories, let’s just get started.

Yellow lentils/ Moong dal sabzi

Ingredients :

  • Moong Dal/ Split yellow lentils – 1 cup
  • Medium sized tomato – 1 roughly chopped
  • Calabash /bottle gourd/ Lauki – 1/2 cup roughly chopped
  • Small onion – 1 roughly chopped
  • Salt
  • Red chilli powder – 1 1/2 tsp (you can add more or less as per your taste)
  • Turmeric powder – 1/4 tsp
  • Kitchen king masala or Garam masala – 1/2 tsp ( optional)
  • Fresh lemon juice – 1 tsp (optional)
  • Mustard seeds – 1/4 tsp
  • Cumin seeds – 1/4 tsp
  • Curry leaves – 4-5
  • Ghee/ Clarified butter or oil – 2 tbsp

Method :

  • Wash the lentils and let it soak atleast for 30 mins ( It cooks faster if done this way. If in a hurry, it can be skipped as well)
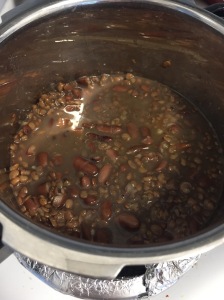
  • Put lentils, veggies and a little salt to a pressure cooker and let it cook up to 3 whistles.

Yellow lentils/ Moong dal sabzi


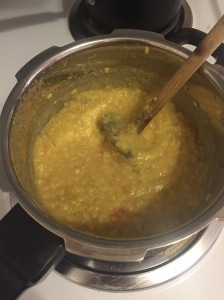
  • Let the cooker cool down, then open it and whisk the dal/ lentils till everything looks incorporated.

Yellow Lentils

  • For the seasoning, take a small pan or kadai – add ghee (can be substituted by oil), mustard seeds, cumin seeds, turmeric powder and red chilli powder.

Yellow lentils

  • As you see them splutter, add them to the lentils. Add salt as per your taste.

Yellow Lentils

  • Add the Kitchen king masala/ garam masala and switch off the stove.
  • Add lemon juice and mix everything together.
  • Tada!! The yummy dal is ready to be served with roti’s/ rice or can just be eaten as is.

Yellow lentils/ Moong dal sabzi

Note :

If the dal looks dry, you can add water to it. I added 1 cup of water and let it boil before serving it

Hope you all enjoyed this recipe.

Until next time, Adios!

Stay happy, stay healthy 🙂
Chocolate Truffles!

Chocolate!! – This is just enough to make my heart want more!! The word itself has so much power, that nothing more needs to be added.

And chocolate truffle – its like a true bliss, like heaven! Haha 😉

That’s how crazy I am about chocolate and anything related to it. So, one day I finally decided that I’m going to learn the art of making Chocolate truffles from one of my very close friends here at Stanford. And to my surprise, it was by far any of the easiest and yummiest recipes I’ve ever had. Trust me!! – Don’t believe it? Then see it for yourself.

Let’s get started!

IMG_4378

Ingredients :

  • Unsweetened baking chocolate bar – 4 oz
  • Dark chocolate (Ghirardelli/ Nestle or any kind) – 8 oz
  • Condensed milk – 14 oz
  • Unsalted butter – 1 stick or 8 tbsp
  • Cocoa powder – for garnishing
  • Cointreau(orange) liqueur, Chambord (Black raspberry)Liqueur – 2 tbsp (optional, can be totally avoided)

IMG_4369

Method :

  • In a deep bottomed pan, melt butter. Do not over heat the butter. As soon as it starts melting, switch off the stove.

IMG_4371

  • Add both the chocolate bars and mix well.

FullSizeRender 24

  • Add condensed milk to the above mixture.

FullSizeRender 25

  • Pour into a bowl and stir vigorously until smooth.
  • Mix until all the ingredients are incorporated well and the consistency turns thick.
  • Add any liqueur of your choice at this point. This step is totally optional.
  • Remember : it should not be a pouring consistency. But not too thick either.
  • Let it freeze atleast for an hour, to the point you can scoop it.
  • After an hour, take the bowl out from the freezer.
  • Scoop out one tbsp of the mix and make small balls by pressing it between your palms.
  • Continue till you finish all the truffle balls.
  • Roll in cocoa powder or even finely chopped nuts of your choice.
  • Tada!! – Chocolate truffle balls are now all ready to be eaten 🙂


ELF Haul & Mini Review

Who doesn’t like inexpensive & drug store make-up products which are actually are too damn good to resist!!

One of the few very good brands I’ve been addicted to is ELF.

Take a look at some of their product reviews in this video we put together for all you lovelies 🙂

Don’t forget to like/comment/subscribe/follow if you like this post!

Stay happy and ‘feel’ beautiful 🙂

Adios!

Paneer Paratha

Paneer Paratha is by far one of the easiest and the best ParatIMG_2550ha’s I’ve ever had. It’s one of my personal favorites & Top 10 yummiest Indian cuisine recipes ever!

So why wait, lets get started.


Ingredients :IMG_2543

  • 100 gms Paneer/cottage cheese
  • ½ tsp red chili powder
  • ¼ tsp turmeric powder
  • ½ tsp chaat masala
  • 1 small onions finely chopped
  • Cilantro leaves – about 4-5 stems finely chopped
  • Curry leaves – 4/5 roughly chopped
  • Salt as per taste
  • Oil for roasting
  • Wheat flour – 1 cup

Method : 

  • Take a large bowl and add whole wheat flour, ½ tsp salt. Pour about ½ cup of water and knead the dough.
  • Add more water as required to knead a soft (not too hard or sticky) dough.
  • Cover it and let is rest till we make the filling.
  • Meanwhile, for the stuffing, grate the cottage cheese (or just crumble it with your hand).
  • Add all the dry ingredients, chopped onions & cilantro.
  • Mix everything well.

IMG_2551

  • Pinch a small round ball of the dough and using a rolling-pin roll it into a circle.
  • Spread the stuffing on one of the rolled dough, keeping one inch space around the circumference.

IMG_2546

  • Cover with the other end of the rolled dough and press the edges well as shown in the picture. This is the easiest way to make any kind of paratha with a filling. It avoids the fear of the stuffing to be too much or too less and also avoids the stuffing to break out while rolling it.

IMG_2547

  • Heat a pan at medium heat. Once it is hot, place the Paratha. Flip when one side is partly cooked.IMG_2552
  • Apply oil on this side and flip it over.
  • Press the edges with a spatula so that the edges are cooked.
  • Cook both sides well till they have golden brown spots on them.
  • Serve hot with yogurt/ green chutney or ketchup ( my personal favorite ;-))

Happy cooking 🙂

Eggless Pineapple Cake

Who doesn’t like cakes and especially if it is homemade with love and tastes sinful 🙂

This eggless version of pineapple cake is a must try and no failure recipe. I am currently teaching an Eggless Baking Class at the Stanford International Center and I must admit that this has been one of the most cherished experiences ever. Thanks to the ladies for letting me take pictures during the class.

3Ingredients:

  • All purpose flour (or) Cake flour – 2 cups
  • Baking powder – 2 tsp
  • Baking soda – 1 tsp
  • Salted butter – ½ cup
  • Sugar – ¾ cup
  • Pineapple extract – 1.5 tsp
  • Milk – 3 tablespoons (as per consistency)
  • Curd – ½ cup
  • Oil – ½ cup
  • Apple sauce (unsweetened) – ½ cup
  • Tinned pineapple slices

Frosting :

  • 2 cups heavy whipping cream
  • Sugar (as per taste)

Method:

  • Firstly, sift all the dry ingredients – the flour, baking powder and baking soda and keep aside.
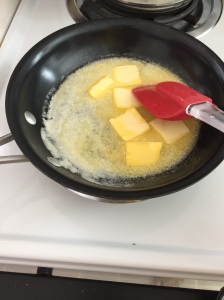
  • Cut the butter into cubes and place in the mixing bowl. Add sugar & cream it till soft and fluffy.

IMG_1887

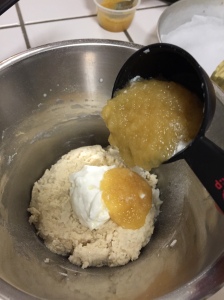
  • Add pineapple extract, apple sauce and curd and whisk well until everything is incorporated well. Add oil to the batter and mix again.

IMG_1889

  • Next add the dry ingredients mix a little by little and remember not to over-beat the batter at this stage
  • Add milk till you get a good consistency of the batter. Nor to , neither too stiff.

IMG_1890

  • Pre-heat the over at 180 degree celsius or 350 F.
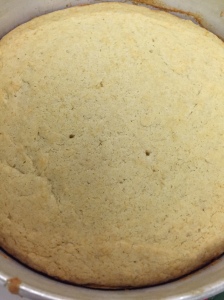
  • Transfer the batter into the cake mould and bake for 20 mins.
  • Do the knife/toothpick test to check if the cake has been cooked properly.

IMG_1891IMG_1892


Frosting:

  • Place the beater blades and the bowl your going to whip the cream in, inside the fridge for at least 30 mins. This fastens the whipping process.
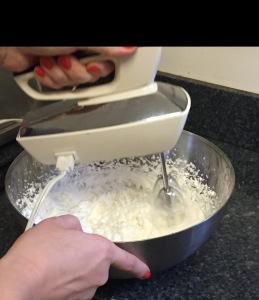
  • Add cream and sugar, whip till it forms soft peaks and does not pour over when you turn the bowl.FullSizeRender

Assembling the cake:

  • Divide the cake into 2 and gently pour a little pineapple water (from the tin) on the halved cake.
  • Places pineapple pieces randomly around the halved cake and then generously coat it with the cream.
  • Place the other halved cake over this and spread the cream all over on the top and sides.

IMG_1917

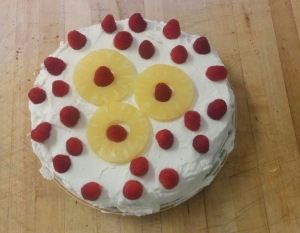
  • Decorate with pineapple and raspberry/strawberry and serve chilled 🙂

3


P.S : A few of the pictures below are from the class. I’m sure the ladies will approve it. Haha 🙂

Happy Baking!

Adios 🙂

Beauty Tip Guru – Uses of Coconut Oil

Hey Beauties,

This is a short video on different tips, tricks and uses of COCONUT OIL..

Watch this video and see the magical uses of Coconut oil Yes, believe me when I say this- Not 1,2,3..but 20 different ways you can make use of this magical and inexpensive method to look beautiful & glowing 🙂

Don’t forget to follow, like or comment if you enjoyed this post!

Adios 🙂

Rajma & Peas Pulao

This was my first experience ever with a cooking class overseas and I must admit, I was overwhelmed.

It is always so much fun to share stories and tales of your country in an international community. Here, at the International Center at Stanford, I’ve been able to try out different things and the journey has been simply amazing. I’m sharing with all of you, the joy & spirit of togetherness got by food. 🙂

Here is a glimpse of the first class that I taught here. We cooked Red Kidney Beans Gravy with Peas Rice. Recipes are given below!

Happy cooking & sharing 🙂

v1 v2 v3 v4

Recipe :

Red Kidney Beans

Ingredients : ( Serves 2)

Kidney Beans – 1 can or soaked overnight & boiled
Water – 1 cup
Salt – to taste
Turmeric Powder – 1/4 tsp
Oil – 2 tbsp
Onions – 2 medium, finely chopped/ blended
Ginger – 1 tsp, minced
Garlic – 1 tsp, minced
Tomatoes – 2 cups, puree
Cumin Powder – 1 tsp
Coriander Powder – 1 tsp
Chaat Masala – 1 tsp                                                                                              

Chilli powder – 1 tsp
Garam Masala – 1 tsp or Rajma masala ( 2 tsp)

Method:.

  • In a medium size pan on medium heat, add in the Oil.
  • Allow it to heat up and add in the Onions & stir frequently.
  • Add in the Ginger and Garlic, mix well and cook till the onions start to brown.
  • Add in the Tomato Puree. Mix again.
  • Cook till the oil starts to seperate. Keep an eye on it and keep stirring frequently.
  • Add in Coriander Powder, Chaat Masala & Garam Masala or Rajma Masala.
  • Add in a little water to help mix in the dry spices and to prevent it from burning.
  • Cook for a couple of minutes
  • Add the kidney beans. Mix well and allow it to come to a boil again. Add salt as per taste.
  • Add in some of the fresh Cilantro leaves and keep some for garnishing.

Peas Rice:

Ingredients:

Basmati rice – 1 cup
Green peas (fresh or frozen)-1 cup
Coriander leaves – fistful/ finely chopped
Salt as required

For the seasoning 
Oil – 1 1/2 tbsp              

Cumin seeds – 1 tsp (optional)
Cardamom -2
Cinnamon – 1 inch piece
Bay leaves – 2

Method:

  • Heat oil in a pan and add the ingredients mentioned under seasoning.
  • Saute for a few seconds.
  • Add peas, chopped coriander leaves. Add rice and saute until the water (if any) evaporates.
  • Add 2 cups of water, salt as per taste (approximately 2 tsp salt) and bring it to boil.
  • Cover the pan with a lid and let it cook completely.
  • Garnish with coriander leaves and enjoy 🙂

Quick Work Make-up Tutorial

Hey Beauties,

All of us are so caught up in the hustle and bustle of our daily routine. We all want to leave home looking beautiful and elegant but we end up not having enough time to do so. We have a solution Follow this quick,simple and easy tutorial, we can solve our life’s biggest problem.. Haha 🙂

Do comment/like/ leave feedback and suggestions! Adios for now 🙂

Masoor Dal Makhani (Black Lentil Dal Soup/ Side Dish)

Who doesn’t like Dal Makhani? It’s always a must-order menu item when we go out to eat in any Indian restaurants!

But this time, I wanted to try an alternative version of Dal Makhani using Masoor Dal instead of the using the traditional urad dal (split black gram) and to my surprise, it was a major hit with my husband and everyone in the family 🙂

I usually make this in all festive occasions, potluck parties or just for ourselves. One of my very close friends, just loves it as a soup!! How cool is that? One recipe with multiple serving styles!

So, let’s get started!…

Ingredients :

  • ¾ cup whole Black Masoor dal ( Black Lentil Dal – soaked overnight
  • ¼ cup rajma ( Black Kidney Beans – soaked overnight)masoordal
  • ½ cup finely chopped onions
  • 1 or 2 green chilies, chopped
  • 2 tsp ginger garlic paste
  • 1 tsp cumin seeds
  • 2 large tomatoes chopped roughly
  • 2 to 3 cloves
  • 1 inch cinnamon
  • 1 small to medium tej patta (bay leaf)
  • ½ tsp red chili powder
  • ½ tsp turmeric powder
  • â…“ cup low-fat cream ( sour cream)
  • ¼ tsp kasuri methi/dry fenugreek leaves, crushed
  • 3 tbsp butter
  • salt as required

Method :

  • Soak Masoor Dal and the kidney beans overnight ( 7-8 hours). Drain them the next morning and add 3 cups of water in the pressure cooker along with the cinnamon stick. Cook oh medium-high flame till soft or till you hear 6-8 whistles. Keep the cooked beans and lentils aside.
  • 2
  • In a pan, add butter. When it begins to melt, add the cloves.
  • Add cumin seeds, bay leaf, chopped onions and sauté them till the onions get translucent. Add a pinch of salt to quicken the process.
  • Next, add 2 tsp of ginger garlic paste and sauté.
  • Next add the chopped tomatoes ( You can use tomato puree as well). Add red chilli powder, green chillies, turmeric powder,salt and give it a thorough mix.
  • 1
  • Close the pan with a lid and cook for 8-10 mins till tomatoes are cooked well enough and you see butter leaving the sides of the pan.
  • Add the cooked lentils and beans and 1 cup of water. (You can adjust the water depending on your choice of consistency).
  • Make sure to stir often to avoid the lentils on sticking to the bottom of the pan.
  • You can break a few lentils and beans from the back of your stirrer to thicken the dal.
  • Keep the dal on simmer for around 9-12 mins. The more you simmer, the better it tastes 😉
  • When the gravy has thickened enough, add cream, kasuri methi. Stir well and switch off the stove.
  • Yum, dal makhani is absolutely ready to be served along with indian bread (roti/ naan) or can be eaten with rice or just served as a soup 🙂

Dal_Makhani


Do share your experiences/ photos and don’t forget to like/comment if you enjoyed this recipe 🙂

Happy cooking! Adios 🙂


Front Window Gift Box

Well, as you all know, I love paper crafting. I have made so many cards, but this time I wanted to try something different. I remember when I was a kid, I would go to a store & pick up anything at all if the packaging appealed to me. I wouldn’t really care what is inside it.. 😉 Well, ‘looks can be deceiving’ is what is said, but to me, it was the only reason to buy anything at all. They make a first impression about the product itself!! So, I started by making some cute little boxes that could be used in any occasion to give to your loved ones. This one here, is one of my favourites. I love the window sheets, as it gives me a sneak peek about the little product inside the package.

Its super easy & makes such an adorable gift box 🙂

IMG_9492

So, let’s get started.

Materials you’ll need :

  1. 7 ½ x 5 inches any colour card stock of your choice.
  2. Ribbon to co-ordinate with your colour of the card stock
  3. Printed paper for decorating your box
  4. Paper trimmer or scissors
  5. Scoring board ( if not, just use the scoring tool)
  6. Tag punch
  7. Acetate Sheet/ Window sheet (5 inch x 5 inch )
  8. Sticky tape or glue

Method :

  • First start by getting your die cut ready. I’ve just printed out my logo on the card stock before prepping it into a box.
  • Score on the long side at 1 ½ inches, 21/2 inches and 6 ½ inches.
  • Score on the short side at 1 inch and 4 inch.
  • Cut the flaps as shown below.IMG_9479.
  • Soften out the score lines to give a good finish.

IMG_9480

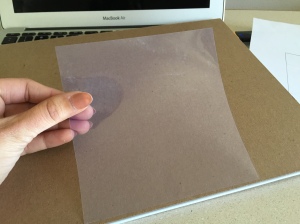
  • Score your window sheet at 1 inch on three sides as show.
  • Snip out the corner squares.

IMG_9481 IMG_9483

  • Then, I just used a chevron printed paper to give a nice look to the top flap of my box and rounded the corners using a punch. You could simply use scissors as well.

IMG_9485 IMG_9484

  • Next, I carefully lined the window sheet with the card stock base and glued it well to create the Front Window.

IMG_9486

  • Then I used the white lace ribbon to give the final look and placed a tag with the logo I designed.
  • And voila, the box is ready!!

IMG_9488

What do you all think? Simple cute, isn’t it?

I was totally inspired by watching several YouTube tutorials. I will hopefully someday be able to shoot and post video tutorials as well 🙂

Don’t forget to like/comment and follow our blog if you liked the post !!

Thanks for stopping by!

Happy crafting!