Spinach lentils Stew / Palak Dal

Off late, I’ve been trying to get on a protein diet. As a vegetarian, we tend to intake a lot of carbs and with all the hustle going on about healthy living, I wanted to indulge in healthy living as well 😉 Hehe.

This palak dal in not only easy and simple, but super delicious as well. Club it with hot Phulka’s or steamed rice or just eat it as is. I’ve made this as a one pot recipe, thus saving more time and effort as well 🙂 So without taking much time, lets jump right in….

Spinach Lentil Stew/ Palak Dal

Ingredients :

  • Spinach finely chopped 15-20 leaves
  • Tur dal (Split pigeon peas) 3/4 cup
  • Turmeric powder 1/2 teaspoon
  • Red chili powder – 1 tsp
  • Asafoetida a pinch
  • Ghee (clarified butter) 2 tablespoons
  • Cumin seeds 1 teaspoon
  • Mustard seeds 1/2 tsp
  • Garlic chopped 3-4 cloves finely chopped
  • Medium sized Onion finely chopped -1
  • Salt to taste
  • Lemon juice 1 teaspoon

Method :

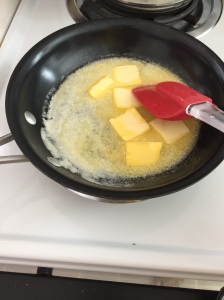
  • In a cooker, add ghee, Asafoetida, cumin seeds, garlic and sauté for one minute. Continue to sauté till onion gets lightly browned.

Palak Dal

  • Add the lentils, turmeric poster, red chili powder, spinach and sauté for half a minute. Mix well.

img_4898

  • Add one cup water, salt and stir.
  • Close the cooker and let it cook till about 3 whistles.
  • Switch the stove and wait till the cooker cools down completely.
  • After 30 mins, open the cooker, add lemon juice, mix and serve hot.

Don’t forget to link/ comment/ share if you enjoyed this post.

Adios 🙂

Homemade Condensed Milk

Preparing condensed milk at home is easy, cheaper, yummier, and yes – my cravings for this sweet milk can be taken care of anytime I want to 😀 . It tastes just like the condensed milk purchased from the market!

Ingredients:

(measurement for 1 tin condensed milk)

  • 1 litre milk (full fat)
  • 300 gms sugar
  • A pinch baking powder

The recipe to make:

  • Boil the milk. Transfer it to a pan, add sugar and keep boiling, stirring at intervals. You can boil it on high flame in the start, but once the milk starts thickening, reduce it to low flame to avoid the milk at the bottom of the vessel from burning. Stir more frequently.

milkmaid-preparation

  • As the milk reaches a consistency a ‘little’ thinner than that of the actual condensed milk, add just a small pinch of baking powder, stir and switch off the gas.
  • The milkmaid will thicken a little more while cooling. Our yummy, delicious and homemade condensed milk is ready!!

homemade milkmaid

Tips:

  • In case the condensed milk forms lumps in the end, not to worry, just blend it in a blender to remove the lumps.
  • NEVER wait for the right consistency of the condensed milk before switching off the gas, as on cooling it with thicken even more.
  • You can store it in the fridge for upto 2 weeks! Voila!

Until next time, Adios:)

Quick and easy Healthy Veggie Sandwich

I love to cook but I also realise how lazy I get when I’ve to cook lunch just for me. I’m excited to cook when I’ve people around, but just for myself, it can get boring. Don’t you agree?

I need something fast, exciting and healthy to keep me motivated to enter the kitchen during these lazy and cozy winter days. So, I walk into the kitchen, open the refrigerator & picked out all the veggies I had . I also had a batch of Homemade Basil Pesto that I had made just 3 days ago and decided – why not a healthy yum Veg Sandwich. And so I put it together and guess what – it turned out super delicious. Voila!! The ingredients used are what most of us have in our pantry and takes no time at all. So why wait? Let’s get started.

Veg sandwich

Ingredients :

  • Peeled and grated carrot – 1/4 cup
  • Peeled and grated bottle guard – 1/4 cup (optional. I had it in my fridge and wanted to make something healthy. So why not? 😉 )
  • Finely chopped onions – 1/4 cup
  • Finely chopped capsicum – 1/4 cup
  • Cheese slices – 2 ( for 2 sandwiches)
  • Oregano – 1/4 tsp
  • Pepper – 1/4 tsp
  • Salt – as per taste
  • Pesto – to apply on the bread
  • Brown Bread slices – 4

Method :

  • Take a bowl and mix all veggies and the seasoning.
  • Place cheese slices on 2 bread slices and apply a generous layer of pesto on the other two slices.

Veg sandwich

  • Scoop 1-2 tbsp of the veggie mix and apply in on the bread slices. Cover with the other bread slice.
  • In a pan, add a little butter and place the sandwich.
  • Cook till its brown on both sides.

Veg Sandwich

  • Serve with ketchup or eat it as is.
  • Yay!! Healthy and quick veggie sandwich is ready to be eaten or even packed for lunch.

img_4519

Hope you all enjoyed this as much I enjoyed cooking it.

Until next time, Adios 🙂

How to find the Perfect Foundation!

Hello everyone,

Ever found yourself lost and confused when it comes to buying the perfect foundation and yet affordable? If yes, you are at the right place.  Come get all your answers in this quick tutorial we have put up for you to make these major life decisions easier! 😉

Don’t forget to like/subscribe/ comment if you liked this post!

Adios for now 🙂

Stay happy, stay beautiful !

Moong Dal Sabzi/ Split Yellow Lentils

Have you wanted to make something healthy yet yummy? Something that doesn’t require buying 100’s of healthy ingredients before getting started? Well, I’ve been there and most of the time I’m inspired to cook healthy meals, I often end up not doing it because I do not have those ingredients in my pantry and then you know what happens :p Mission healthy food : FAILS! Hahaha

But who comes to rescue during these tragic moments of course my MOM 🙂 This lentils recipe is not only super yummy but super super healthy as well and guess what : all the ingredients used are almost available all the time. So instead of having you all to read more of my stupid tragic stories, let’s just get started.

Yellow lentils/ Moong dal sabzi

Ingredients :

  • Moong Dal/ Split yellow lentils – 1 cup
  • Medium sized tomato – 1 roughly chopped
  • Calabash /bottle gourd/ Lauki – 1/2 cup roughly chopped
  • Small onion – 1 roughly chopped
  • Salt
  • Red chilli powder – 1 1/2 tsp (you can add more or less as per your taste)
  • Turmeric powder – 1/4 tsp
  • Kitchen king masala or Garam masala – 1/2 tsp ( optional)
  • Fresh lemon juice – 1 tsp (optional)
  • Mustard seeds – 1/4 tsp
  • Cumin seeds – 1/4 tsp
  • Curry leaves – 4-5
  • Ghee/ Clarified butter or oil – 2 tbsp

Method :

  • Wash the lentils and let it soak atleast for 30 mins ( It cooks faster if done this way. If in a hurry, it can be skipped as well)
  • Put lentils, veggies and a little salt to a pressure cooker and let it cook up to 3 whistles.

Yellow lentils/ Moong dal sabzi


  • Let the cooker cool down, then open it and whisk the dal/ lentils till everything looks incorporated.

Yellow Lentils

  • For the seasoning, take a small pan or kadai – add ghee (can be substituted by oil), mustard seeds, cumin seeds, turmeric powder and red chilli powder.

Yellow lentils

  • As you see them splutter, add them to the lentils. Add salt as per your taste.

Yellow Lentils

  • Add the Kitchen king masala/ garam masala and switch off the stove.
  • Add lemon juice and mix everything together.
  • Tada!! The yummy dal is ready to be served with roti’s/ rice or can just be eaten as is.

Yellow lentils/ Moong dal sabzi

Note :

If the dal looks dry, you can add water to it. I added 1 cup of water and let it boil before serving it

Hope you all enjoyed this recipe.

Until next time, Adios!

Stay happy, stay healthy 🙂

How to choose ‘the perfect’ Lipstick!

Hey lovelies!!

Lipstick, like clothing, has become seasonless- matching your own coloring is the goal now for the most of us!!

Have you had trouble choosing the right lipstick shade for your specific skin tone? I’ve always been overwhelmed with the enormous variety of shades available in the market today & have always wanted to try them all ! Haha 😉 As a result, I ended up buying a lot of them and when I actually had to put it on, it just doesn’t work!  They simple lie in my makeup bag and eventually I end up trashing it or giving it to my mom! What a shame right!?

To avoid all this and help choose the right shade, we have come up with these tips and ideas that will help you all make a better decision. Also, end up saving money right?

Don’t forget to like/comment/ subscribe if you enjoyed this post 🙂

Adios!

‘Feel’ beautiful!

Chocolate Truffles!

Chocolate!! – This is just enough to make my heart want more!! The word itself has so much power, that nothing more needs to be added.

And chocolate truffle – its like a true bliss, like heaven! Haha 😉

That’s how crazy I am about chocolate and anything related to it. So, one day I finally decided that I’m going to learn the art of making Chocolate truffles from one of my very close friends here at Stanford. And to my surprise, it was by far any of the easiest and yummiest recipes I’ve ever had. Trust me!! – Don’t believe it? Then see it for yourself.

Let’s get started!

IMG_4378

Ingredients :

  • Unsweetened baking chocolate bar – 4 oz
  • Dark chocolate (Ghirardelli/ Nestle or any kind) – 8 oz
  • Condensed milk – 14 oz
  • Unsalted butter – 1 stick or 8 tbsp
  • Cocoa powder – for garnishing
  • Cointreau(orange) liqueur, Chambord (Black raspberry)Liqueur – 2 tbsp (optional, can be totally avoided)

IMG_4369

Method :

  • In a deep bottomed pan, melt butter. Do not over heat the butter. As soon as it starts melting, switch off the stove.

IMG_4371

  • Add both the chocolate bars and mix well.

FullSizeRender 24

  • Add condensed milk to the above mixture.

FullSizeRender 25

  • Pour into a bowl and stir vigorously until smooth.
  • Mix until all the ingredients are incorporated well and the consistency turns thick.
  • Add any liqueur of your choice at this point. This step is totally optional.
  • Remember : it should not be a pouring consistency. But not too thick either.
  • Let it freeze atleast for an hour, to the point you can scoop it.
  • After an hour, take the bowl out from the freezer.
  • Scoop out one tbsp of the mix and make small balls by pressing it between your palms.
  • Continue till you finish all the truffle balls.
  • Roll in cocoa powder or even finely chopped nuts of your choice.
  • Tada!! – Chocolate truffle balls are now all ready to be eaten 🙂


ELF Haul & Mini Review

Who doesn’t like inexpensive & drug store make-up products which are actually are too damn good to resist!!

One of the few very good brands I’ve been addicted to is ELF.

Take a look at some of their product reviews in this video we put together for all you lovelies 🙂

Don’t forget to like/comment/subscribe/follow if you like this post!

Stay happy and ‘feel’ beautiful 🙂

Adios!

Homemade Basil Pesto Sauce

I love pasta, especially with Pesto sauce. It’s definitely the yummiest (in my opinion;) ) pasta sauce I’ve ever tasted!! You can use this as a dip, or spread it over a toast or make a sandwich! Endless options, isn’t it. Lets get started.

FullSizeRender 23

Ingredients:

  • Fresh Basil Leaves – 1 cup
  • Pine nuts – 1/4 cup ( can substitute with walnuts or cashew nuts)
  • Extra Virgin Olive oil – 3/4 cup
  • Grated Parmesan cheese – 1/2 cup
  • Garlic cloves – 2
  • Freshly ground black pepper – 1/4 tsp
  • Salt as per taste

Method :

  • Combine the basil, pine nuts, garlic, and olive oil in a blender and blend to a puree. Add the cheese, salt and pepper, and blend again.IMG_4335
  • If you want to store it – transfer in air tight container and pour a little bit more oil on the top. It’s good to go !! IMG_4336

IMG_4339

  • Combine with boiled pasta, cherry tomatoes to make the perfect Pesto Pasta.
  • Enjoy!!!

Do like/comment/share if you enjoyed this post 🙂

Adios!

Paneer Paratha

Paneer Paratha is by far one of the easiest and the best ParatIMG_2550ha’s I’ve ever had. It’s one of my personal favorites & Top 10 yummiest Indian cuisine recipes ever!

So why wait, lets get started.


Ingredients :IMG_2543

  • 100 gms Paneer/cottage cheese
  • ½ tsp red chili powder
  • ¼ tsp turmeric powder
  • ½ tsp chaat masala
  • 1 small onions finely chopped
  • Cilantro leaves – about 4-5 stems finely chopped
  • Curry leaves – 4/5 roughly chopped
  • Salt as per taste
  • Oil for roasting
  • Wheat flour – 1 cup

Method : 

  • Take a large bowl and add whole wheat flour, ½ tsp salt. Pour about ½ cup of water and knead the dough.
  • Add more water as required to knead a soft (not too hard or sticky) dough.
  • Cover it and let is rest till we make the filling.
  • Meanwhile, for the stuffing, grate the cottage cheese (or just crumble it with your hand).
  • Add all the dry ingredients, chopped onions & cilantro.
  • Mix everything well.

IMG_2551

  • Pinch a small round ball of the dough and using a rolling-pin roll it into a circle.
  • Spread the stuffing on one of the rolled dough, keeping one inch space around the circumference.

IMG_2546

  • Cover with the other end of the rolled dough and press the edges well as shown in the picture. This is the easiest way to make any kind of paratha with a filling. It avoids the fear of the stuffing to be too much or too less and also avoids the stuffing to break out while rolling it.

IMG_2547

  • Heat a pan at medium heat. Once it is hot, place the Paratha. Flip when one side is partly cooked.IMG_2552
  • Apply oil on this side and flip it over.
  • Press the edges with a spatula so that the edges are cooked.
  • Cook both sides well till they have golden brown spots on them.
  • Serve hot with yogurt/ green chutney or ketchup ( my personal favorite ;-))

Happy cooking 🙂